Front wheel electric bike conversion kit guide: upgrade your bike effortlessly
There are several ways to convert your bike to an e-bike, with front wheel motor kits striking a good balance between ease of fitting and performance.
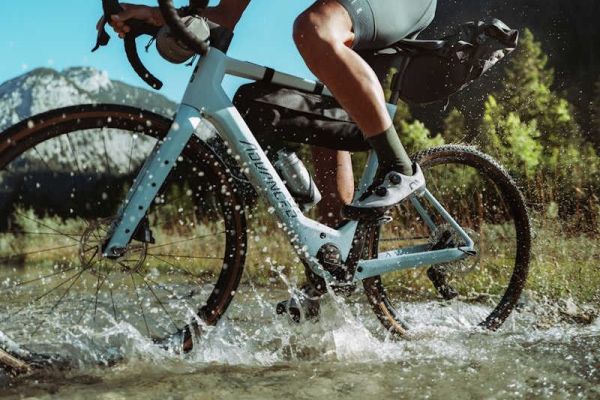
 E-bike DIY front wheel conversion kit on mountain bike
Key takeaways
-
Front wheel conversion kits are a straightforward way to turn your existing bike into an e-bike.
-
Fitting is quite straightforward but get a bike shop to do it if you're not sure.
-
You must make sure that you get a wheel that is compatible with your existing bike in terms of size, axle dimensions and braking system.
Table of contents
- Key takeaways
- What is a front wheel electric bike conversion kit
- Main components
- Choosing the right electric bike conversion kit
- Advantages of front wheel conversion kits
- Disadvantages of front wheel conversion kits
- Examples
- Installation
- Troubleshooting common issues
- Safety considerations
- Frequently asked questions
- Summary
We're fiercely committed to editorial independence. To fuel us to craft expert content we use affiliate links (*) through which we may receive commission.
What is a front wheel electric bike conversion kit?
There's a huge array of off-the-shelf e-bikes on the market, but what if you've already got a good unassisted bike that you'd like to keep using? There are several ways to turn a conventional bike into an electric bike, with front wheel conversion kits striking a good balance between effectiveness and ease of fitting.
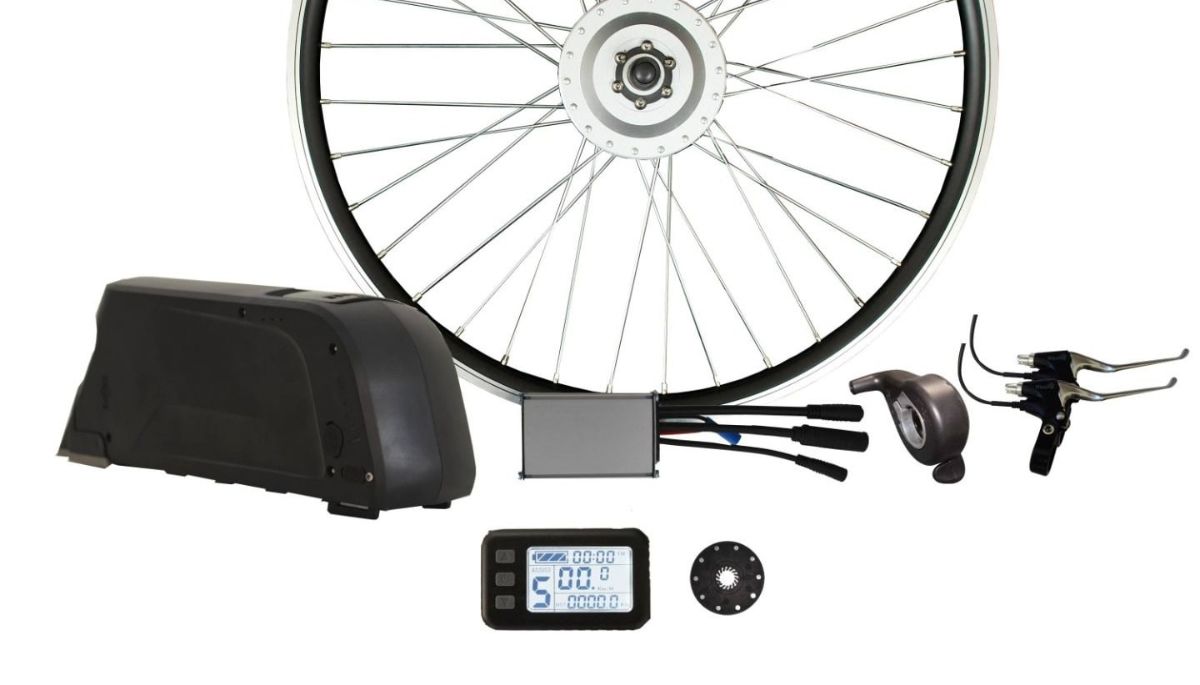
These kits consist of a motorised front wheel that replaces the front wheel on your existing bike; a battery to power it; a pedal sensor; and some form of controller. Read on for all the details, what to look for and other tips.
Main components
Motor
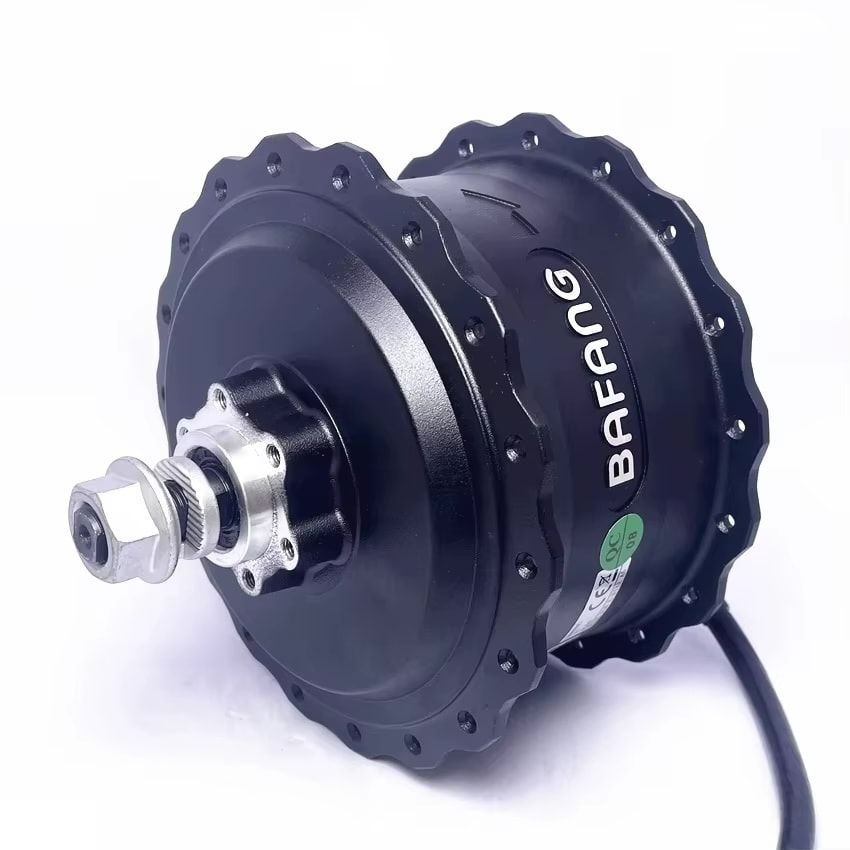 Bafang hub motor for e-bike diy conversion
The key characteristic of a front wheel e-bike kit is that the electric motor is housed in the wheel itself. In a normal front wheel, the outside part of the hub (the shell) spins around the axle (fixed to the bike) on ball bearings. This also happens in a motorised wheel but rather than just coasting, there's a motor between the axle and the shell to drive it.
There are two ways that this can be achieved. The simplest is a direct drive hub motor, where effectively the whole front hub is the motor. The hub axle is the motor spindle, the hub shell is the motor casing and when power is supplied the shell spins around the axle. This design has very few moving parts and there's not much to go wrong. But because the motor speed is exactly the same as the wheel speed the motor has to run quite slowly. Typically an e-bike wheel will be spinning at around 200 revolutions per minute, so that's the speed at which the motor has to run. That's less efficient - electric motors are more efficient at higher speeds.
The more complex (but, perhaps counterintuitively, more efficient) option is a geared hub motor. In this design, the motor drives a system of gears, which in turn drive the hub shell. The gears are arranged so that the motor spins much faster than the hub shell, allowing the motor to run at a more efficient speed, into the thousands of revolutions per minute. A geared hub also gives more torque (or pulling effort) from the motor.
Electric motors can be either brushed or brushless. Brushed motors are simpler and don't need complex controllers, but are less efficient and more subject to wear as they have parts in contact with one another as they spin. Brushless motors are more sophisticated, more efficient and more controllable. They're also contactless so require less maintenance, but they're more expensive.
Battery pack
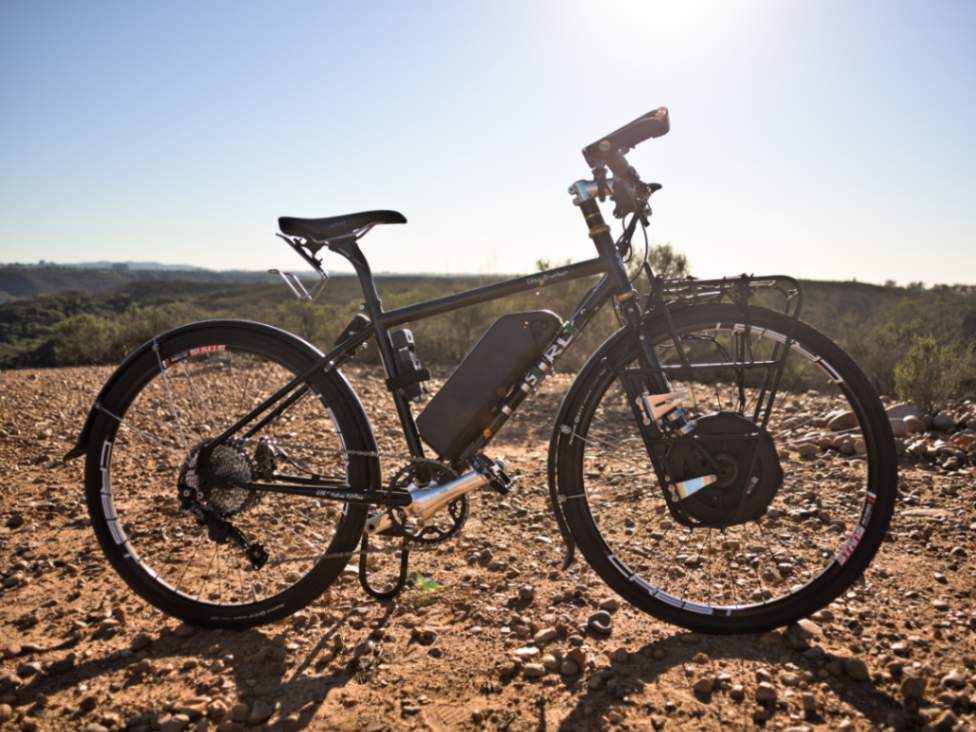
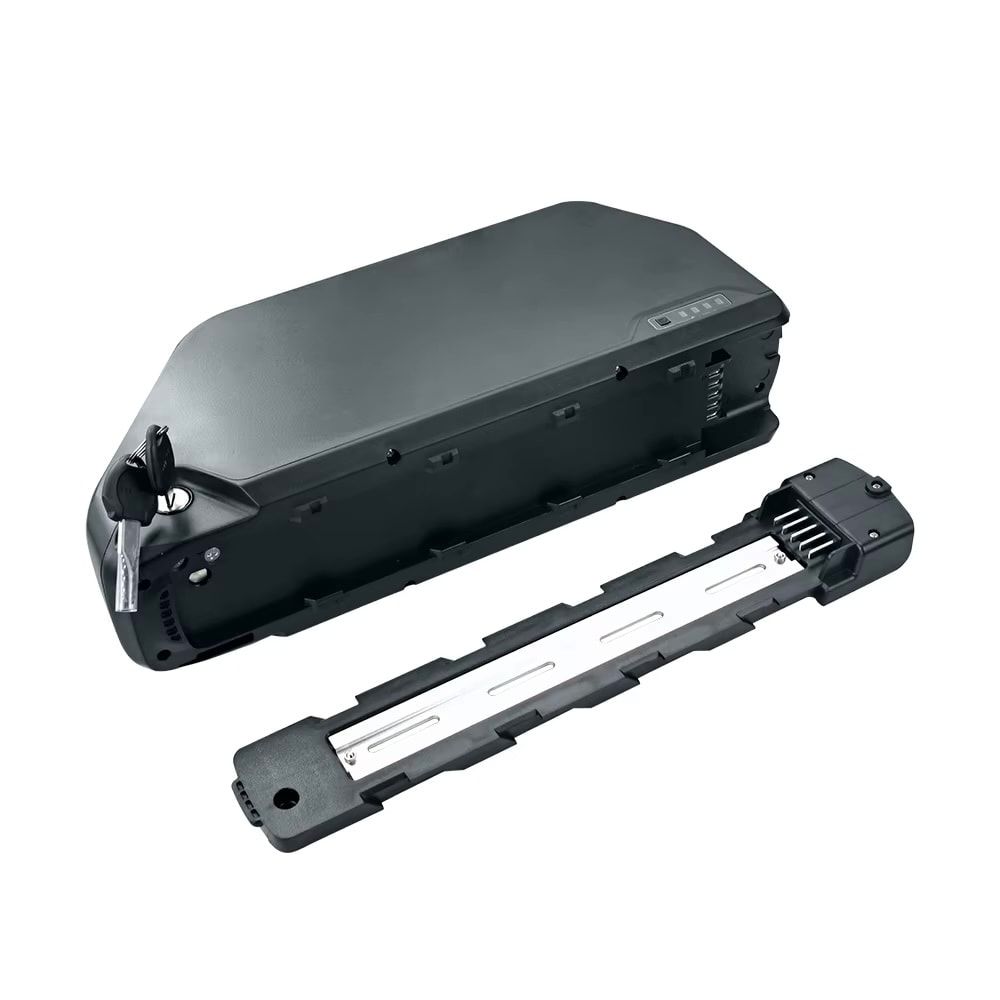 Frame mounted e-bike diy conversion battery pack
Purpose-built e-bikes will often feature integrated batteries tucked away inside the frame, but if you're converting an existing bike then that's not an option. Conversion kits often give you a choice of battery styles and positions to best suit the bike that you're converting.
Rack mounted battery
Batteries are often mounted on a rear rack, which makes a lot of sense if you're converting a bike for practical, utility purposes as you'll probably want a rack anyway for carrying luggage. Make sure that the battery position is compatible with whatever else you want to use the rack for. If the battery sits on top of the rack then you may not be able to use a bag or box at the same time, but you should still be able to use panniers. Many batteries mount underneath the rack platform, keeping the top available for a bag.
Rack mounted batteries help with front/rear weight distribution, with the weight of the battery at the back balancing the weight of the motor at the front. Such batteries do sit quite high, though, and this can make your bike feel a little top-heavy (especially with luggage as well). It's not usually a problem but it may take a little while to get used to.
Your bike also needs suitable threaded mounts on the frame to bolt a rack to. These are common but not universal - most utility or trekking bikes have them, but high-end race-oriented road bikes and many mountain bikes don't. Note that they're sometimes cunningly concealed! It's sometimes possible to add mounts but bear in mind that a battery is a significant load.
Frame mounted battery
A second option is to position the battery on the frame, either using existing mounts intended for water bottles (which most bikes have) or in a bag strapped to the tubes. Either of these options requires space on the frame, which is usually plentiful on traditional "double diamond" bikes (inside the front main triangle of the frame) but can be constrained on some designs like step-through frames or just because the bike is small.
Using water bottle mounts makes a lot of sense, as bolting things down is generally more secure and stable than Velcro straps or buckles. Bear in mind that water bottle mounts are designed for carrying less than 1kg of water, which would be a very small battery. E-bike batteries can be up to 5kg. In practice battery suppliers will often supply their own brackets with extra features to take some of the load from the bolts, so this is more of a concern for home-brew converters.
Bolted-on brackets typically allow easy battery removal, useful for charging away from the bike but make sure there's some sort of lock!
Strapped on battery bag
Some frames will require the use of a bag or case strapped to the frame. Conversion kit manufacturers will often have a range of different shapes or styles to fit different frame designs and accommodate different battery capacities. Long rectangular packs can fit under the top tube or along the down tube (either above or below), while triangular packs can sit neatly inside the frame triangle. Again, the more conventional your bike is, the easier it'll be to find a battery bag to fit.
Security and stability are the main things to look for in battery bags. Ideally there'll be straps around more than one tube to prevent the battery swaying. Generally the more fixings the better for stability, although at the expense of more fiddly removal. As it's difficult to make this kind of battery theft-proof you may find yourself removing it a lot.
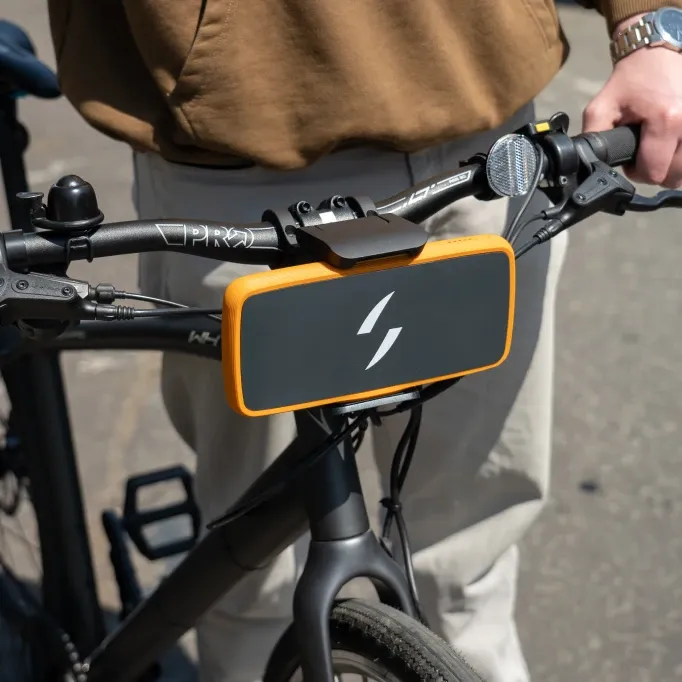
Handlebar mounted battery
The final option is a handlebar-mounted battery, usually using a specific quick release bracket that bolts to the bars and that the battery pack clips into. These can be locked but are also easy to remove, but it does limit the size of the battery and you may have to work around other things already attached to the bars like lights or bike computers.
There was a brief trend for all-in-one wheels that put the batteries in the hub as well as the motor. It's an attractive idea in terms of easy installation and minimum wiring, but low range, high weight and internal complexity meant that they never took off in a big way.
Sensors, controllers and wiring
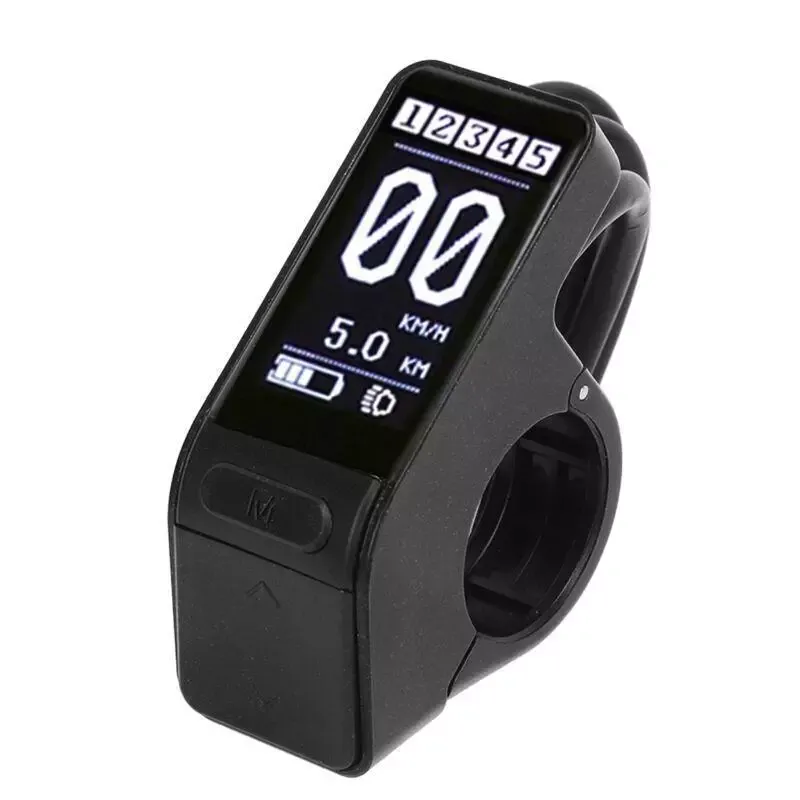 Handlebar mounted compact display for diy e-bike conversion
To comply with e-bike regulations in the UK and other territories, the motor must provide pedal assistance only - that is, if you're not pedalling, the motor's not running. That means that the system needs some way of knowing if you're pedalling or not. Mid-drive motors can use a torque sensor for this, but that's not an option for wheel motors. For front wheel kits this will typically be a simple crank speed sensor, with a magnet on one crank arm and a sensor on the frame.
The regulations also require motor assistance to cut out about 25kph (15.5mph) so the system will need a speed sensor. This could be integrated into the front hub or there may be another magnet on one of the front wheel spokes and a sensor on the front fork.
Both of these sensors will send signals to a control unit, usually combined with the essential LCD display on the bars showing speed, charge remaining and other settings. Different systems have different configuration options for assistance levels which may be accessed directly on the display or via an additional remote button on the bars.
The battery, motor, sensors, display and controls all need to be connected by wires. Depending on the battery and sensor positions, there could be quite a lot of wire which will all need to be routed and secured.
Choosing the right electric bike conversion kit
Getting the right wheel
The first thing to look at is the wheel itself, which has to be compatible with your existing bike. There are three things to look for - wheel size, axle standard and brake type. Most manufacturers will offer a range of kits to fit different bikes and the good ones will help you to identify the kit you'll need.
Size
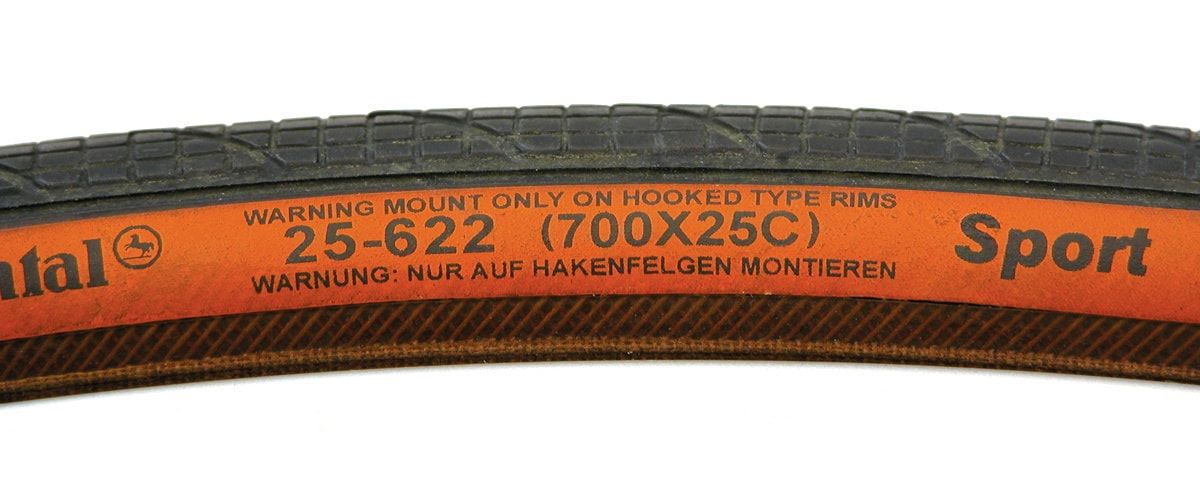 Tyre wall showing wheel size for bike
First, wheel size. This is exactly what it sounds like - the diameter of the wheel. Generally this needs to be exactly the same as the existing wheel so that it fits in the fork and you can use the same tyre. There can be some exceptions but they're fairly niche and beyond the scope of this article. The best way to establish the wheel size is to look at the tyre, which will be marked with the size.
Confusingly, there are several ways to describe wheel/tyre sizes. You'll often see wheel size given in inches, which generally (but not universally) indicates the approximate outside diameter of the tyre. This is common on mountain bikes (26in, 27.5in, 29in), children's bikes (12, 14, 16, 20, 24in) and small-wheeled folders or city bikes (often 16 or 20in). These sizes are often combined with another measurement for the width, so a mountain bike tyre could be 29x2.35in and a folding bike 16x1in.
Road and gravel bikes often use the traditional French standard, with the outer tyre diameter in mm and a letter indicating the width. The conventional road bike size is 700C, some gravel bikes are 650B and so on.
The most precise method is the ETRTO standard. ETRTO is the European Tyre and Rim Technical Organisation that (among other things) specifies a standard way to describe tyre and rim sizes for all vehicles, including bicycles. ETRTO sizes use two numbers. The first is the width of the tyre in mm, the second is the bead seat diameter of the rim, also in mm. This is the part of the rim that the tyre beads sit into.
This system makes it much clearer that a 29in mountain bike wheel and a 700C road bike wheel actually use the same diameter rim - in ETRTO numbers they're both 622mm. The only difference is the width - the mountain bike rim will be wider to accommodate wider tyres.
The whole thing is potentially a minefield, but thankfully the vast majority of bikes available fall into one of a fairly small number of sizes. There are dozens of historical oddities but you're probably not fitting motors to those. This table shows the common Imperial and French sizes and the ETRTO equivalents:
|
Imperial/French |
ETRTO |
|
29in/700C |
622mm |
|
28in |
622mm |
|
27.5in/650B |
584mm |
|
26in |
559mm |
|
24in |
507mm |
|
20in |
406mm |
|
16in |
305mm |
|
14in |
254mm |
|
12in |
203mm |
Axle standard
For decades there was pretty much just one way to fit a front wheel into a frame. The slotted fork ends (or "dropouts" would be 100mm apart and sized to fit a 9mm or 10mm axle. This would either be a solid axle with nuts on the ends to secure it, or a hollow axle with a quick-release skewer through it. QR skewers have a lever on one end - open the lever to remove the wheel.
In recent years, though, there has been a proliferation of other systems, largely due to the demands of disc brakes and also the desire for stronger, stiffer wheels on mountain bikes. These systems usually use a "through-axle". Rather than slots that the wheel drops into, the fork ends have holes. The axle is effectively a long bolt that goes through one fork end, through the hub and threads into the opposite fork end. The two dominant measurements here are the traditional 100mm spacing but with a 15mm axle (aka 100x15mm) and the same diameter axle but with wider fork ends (110x15mm, also known as Boost spacing).
Because the torque from the motor is being resisted by the front fork, the fork needs to be reasonably robust. Some conversions have optional torque arms to spread the load.
Brakes
While the vast majority of modern bikes come with disc brakes, using a brake caliper on the fork near the axle to grip a hub-mounted brake rotor, traditional rim brakes are still around, particularly at the budget end of the market. Rim brakes have brake arms mounted at or near the top of the fork, with the brake pads rubbing on the wheel itself to slow you down. If you're converting an older bike it may well have this type of brake.
If your bike has disc brakes, then the hub motor you use will need to have suitable mounts for the brake rotor. These will either be six bolts or a splined Centrelock fitting with a lockring. If you get a motor with the same fittings as the wheel you have then you can just swap the brake rotor over, but the only downside of getting the other fitting is that you'll need to buy a new rotor. The brake itself doesn't mind how the rotor attaches to the rim as long as it's the same diameter.
If your bike has rim brakes, then you need to make sure that the wheel rim is suitable. Since disc brakes have become popular, the shape of wheel rims has changed as they no longer need to provide a flat braking surface, so don't take it for granted. It's worth noting that there's no problem using a front hub with brake rotor mounts on a bike with rim brakes - you just don't use the rotor mounts.
Advantages of front wheel conversion kits
-
They're easy to fit. If you can change a tyre or fit a pannier rack, you can fit a front wheel kit.
-
A driven front wheel works well for most purposes.
-
There's a lot of flexibility in terms of battery size and placement to fit your needs.
Disadvantages of front wheel conversion kits
-
Wheel motors don't use your bike's existing gears so you can't get the most out of the motor.
-
Front wheel motors can lose grip on hills on a heavily-laden bike.
-
There are lot of things to check to make sure you get a compatible system.
-
Some kits are more expensive than a basic complete e-bike.
Examples
Swytch Air DIY e-bike conversion kit
 Swytch air compact battery for e-bike diy conversion
UK company Swytch is now several iterations in to its e-bike conversion system, which puts ease of fitting to the fore. All the kits use the same 250W geared hub motor (in a choice of silver or black), which has mounts for a disc brake rotor. Swytch will supply a full wheel in a range of sizes (using a rim with a braking surface for traditional rim brakes) or you can just get a hub to have a wheel built around if you prefer. There are two battery formats, the bar-mounted Air or the frame-mounted Go, both available in a choice of capacities. There are lots of options, including displays, controls and additional batteries.
Swytch Bike (from £499)
Cyclotricity
 Cyclotricity economy e-bike front wheel conversion kit
Cyclotricity offers a range of conversion kits in front wheel, rear wheel and even mid-drive categories. While some of its kits aren't for use on public roads, the 250W front drive kit with pedal assist is EAPC regulations compliant and affordably priced. Battery options start with a 250Wh rack-mount battery.
Cyclotricity 250W front drive eKit (from £300)
Cytronex
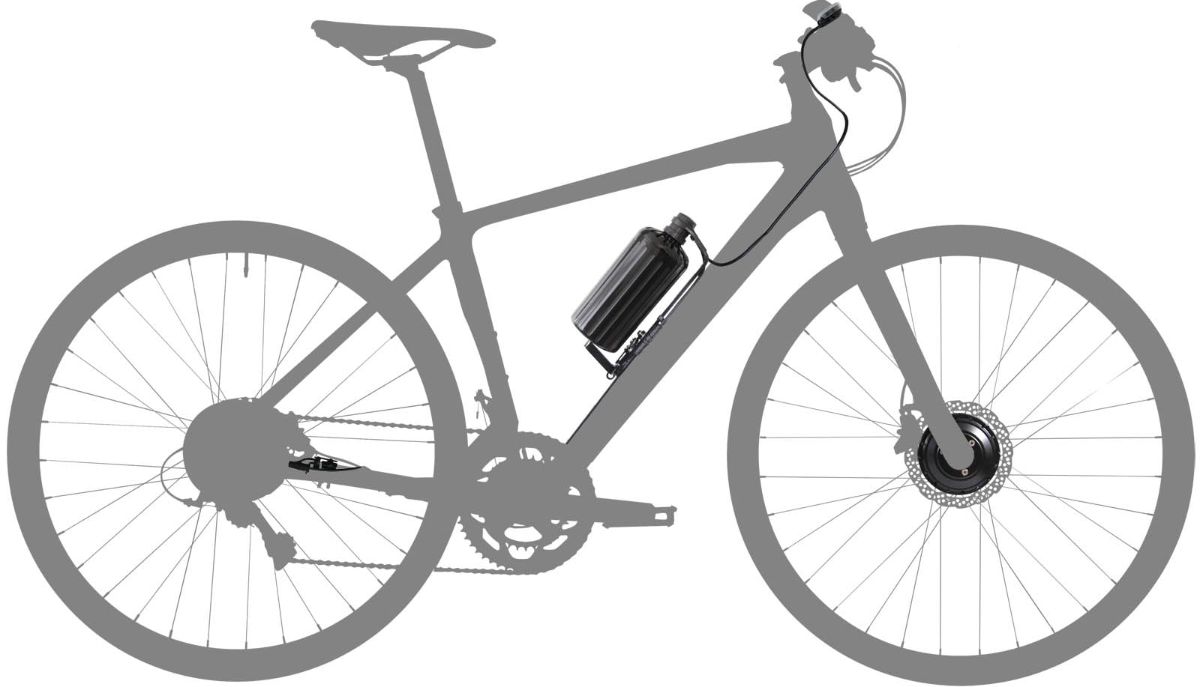 Bottle mounted battery on Cytronex's C1 diy e-bike front wheel conversion kit
The Cytronex kit has a good reputation for being well thought out and robust. It uses a 198Wh bottle-shaped battery that also contains the control electronics and fits into a special mount that bolts to the bottle cage mounts on the frame. There's a range of available wheel sizes and you can also get Cytronex to retrofit your bike for you rather than doing it yourself.
Cytronex C1 (from £1,000)
Installation
Front wheel conversion kits are a straightforward way to turn your bike into an e-bike. If you've done any rudimentary bike maintenance and have some basic tools it's probably within your grasp, but if you're at all unsure then get a professional mechanic or bike shop to do it. It'll add cost but you know it'll work properly.
Kits will vary in the specifics of installation so read and follow the manufacturer's instructions carefully. Front wheel kits all have some fundamental steps in common, though.
Fitting the wheel
You'll need to take the existing front wheel out of your bike, remove the tyre and inner tube, fit the tyre and tube to the new motorised one and put the new wheel back into the forks. This is pretty much the same process as replacing a punctured inner tube, so if you've ever changed a tyre this is very doable.
The only caveat is that most motors use a 10mm axle and if your bike uses a quick-release front wheel it's probably designed for a 9mm axle. Sometimes there's enough tolerance each way for it to fit, but some gentle filing may be necessary. Again, check wih a shop or mechanic if unsure.
Fitting the battery pack
The battery will need to be mounted. This could be as simple as Velcroing a bag to the frame, or it might involve fitting a rear rack. If there's a rack then it's the same as fitting a normal pannier or luggage rack. Often this is straightforward although many racks have lots of adjustment and mountain options to fit different sizes and styles of frame so it can be fiddly. As ever, follow the manufacturer's instructions.
Bar-mounted batteries will generally have a bracket to bolt to the handlebar. Again, this is straightforward but make sure that it doesn't interfere with the brake and gear cables.
Sensors, display and controls
You'll have to fit at least one sensor to measure the crank speed so that the system knows you're pedalling. Usually this just involves cable ties and sticky pads, the only tricky part is getting everything lined up properly. Depending on the kit there may be a separate wheel speed sensor too.
Depending on your kit there may be a bar-mounted display and/or buttons. These typically use hinged brackets so you can bolt them to the bars without having to take off handlebar grips or other controls. You might have to move brakes levers or gear shifters along the bars to make space, though.
Wiring and connectors
At minimum, there'll be wires connecting the motor, battery, control unit and pedal sensor. In some systems the control unit is integrated with the battery so there may only be two wires - motor to battery and pedal sensor to battery. If there's a bar-mounted display that's usually an extra wire (although some are wireless) and the same with bar-mounted setting buttons.
Usually wiring is simply a question of plugging things in and securing the cable runs to the frame so they don't get tangled with any moving parts. Most kits will come with cable ties for this but there's no harm adding more - they're cheap. Some cable runs can be quite long if you've got a front hub motor and a rear rack battery. Take your time thinking about the most direct, neatest route and make sure that nothing gets tangled up with existing gear or brake cables.
Troubleshooting common issues
Once installed conversion kits should be relatively trouble free. Most issues are likely to come from wiring, so if anything goes wrong start by checking for loose or corroded connectors.
Safety considerations
Make sure that your conversion kit complies with local regulations for road use. In the UK, Europe and other territories that means pedal assist only, 250W maximum continuous power and a cut-off at 25kph (15.5mph). Most manufacturers have a kit that fits the bill but make sure you tick the right boxes.
All the usual bicycle safety issues apply to a converted e-bike too. In particular, effective brakes are important as your converted bike is heavier and probably moving faster. In the UK you need lights after dark. Off-the-shelf e-bikes often include lights powered from the main battery but most conversion kits require lights to be added (and powered) separately.
Frequently asked questions
How much weight will a front wheel ebike conversion kit add?
Batteries weigh between 1 and 5kg depending on capacity and motors add at least 1kg, so at minimum you're looking at around 3kg extra weight once you've taken brackets, mounts and so on into account. A rack-mounted battery will also add the weight of a rack unless you already have one.
How much do they cost?
For a kit from a recognised brand, somewhere between £300 and £1000 depending on motor performance, battery capacity, weight and how polished the kit is.
Should I just buy a new electric bike?
It's up to you. While you can get a whole new e-bike for less than the price of a conversion kit, you're comparing an entry-level bike with a high-end kit. Most entry-level e-bikes are essentially inexpensive bikes with a conversion kit on anyway. If your existing bike is a bit tired and needs work, it may not be worth converting it, but if it's in good shape, has good equipment or if you just really like it, a conversion may well be worthwhile.
Summary
If you want to convert your existing bike into an e-bike, a front motor kit is one of the easiest ways to do it. Fitting one is reasonably straightforward and they perform well under most circumstances, although they're not at their best on really steep hills. You need to consider wheel size, axle fitting and battery location to get a kit that will work well with your bike.

Related content
Read more great content from ebike.help and become an electric bike expert today.